What should I read first?
Use the beginner guide for combat and exploration rules, then switch to the walkthrough only when route progress stops.
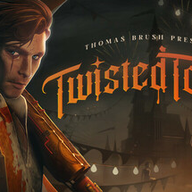 Twisted Tower Guides
Beginner route, walkthrough, weapons, and bosses.
Twisted Tower rewards controlled exploration more than blind speed. The resort mixes first-person combat, environmental traps, keys, alternate routes, and movement toys across five themed levels. A useful guide path therefore begins with survival fundamentals, moves into route planning, and only then narrows into weapons or bosses. This hub organizes those decisions so a first-time player can choose the smallest amount of help needed without reading past major discoveries.
Start with the beginner guide if movement, ammunition, or room-clearing still feels inconsistent. Choose the walkthrough when you know the controls but cannot identify the next objective. The weapons guide is a loadout decision tool, while the boss guide focuses on arena reading and damage windows. Each article labels version-sensitive observations and keeps official facts separate from route advice.
Learn how to clear a room, keep a retreat lane, scan vertically, and decide when a side branch is worth the risk.
Follow the floor-by-floor walkthrough when an elevator, key, power state, or set piece blocks your ascent.
Compare close, accurate, crowd-control, and burst roles before spending scarce ammunition in the wrong room.
Use the boss guide to identify adds, cover, hazards, telegraphs, and safe damage windows before committing resources.
Use the spoiler-marked ending dossier to separate the final scene from reviewer interpretation.
Use the beginner guide for combat and exploration rules, then switch to the walkthrough only when route progress stops.
No. Official material advertises varied paths, so use landmarks and unlock conditions instead of expecting every doorway to appear in one fixed order.
Keep heavy ammunition for crowded arenas and bosses; ordinary rooms are where spacing, accurate fire, and environmental awareness should do most of the work.
Learn combat rhythm, exploration priorities, traps, mobility toys, and resource rules before climbing beyond the hotel.
Follow a spoiler-controlled route through the hotel, waterpark, clown casino, carnival forest, and space station.
Match toy-box weapons to range, target pressure, and ammunition supply, from the mallet to late-game heavy guns.
Use the official Version 1.2 Spider Mother note to separate one confirmed named arena encounter from unverified launch-era boss rosters and phase claims.
Follow the final sequence involving Vincent, Charlotte, and Twister while separating observed launch scenes from attributed interpretation and theory.
Yes. Begin with the hub, gate, and exit checks in each floor section. Only move into the exact sequence after you have searched visible branches and tested the room state yourself.
No. Route logic remains useful across settings, but ammunition pressure and recovery windows can differ. Treat resource totals as planning advice rather than guaranteed counts.
Puzzle mechanisms, the green key, and collectibles live in the Puzzles hub. Requirements, estimated length, crashes, and black screens are grouped in Help so route advice stays focused.
Leave after the current objective is confirmed, the room is safe, and reachable branches have been checked. Do not spend scarce health or ammunition forcing an optional search when a newly found movement toy suggests a safer return later.
Need another kind of answer? Visit Guides for combat and routes, Puzzles for mechanisms and keys, or Help for requirements and technical recovery.